RideAmigos offers the built-in ability to send emails to multiple users at the same time. We call this “bulk email” within our platform but you might also hear it called mass email or email marketing elsewhere. Here’s how to send and manage bulk emails using RideAmigos.
(Not available for Basic Network Managers.)
Sending Email
Sending an email requires two main steps: determining who will receive the email and creating the content.
1) Determine where you will source your recipients
To help you target the right users with the right messages, the ability to send bulk emails appears in several places throughout the RideAmigos platform. Where you source your recipients will usually depend on who you’re trying to reach and what you’re trying to say.
Note: There is a default maximum of 2,000 users for a single bulk email. If any of the sources below are displaying more than 2,000 users, the “Send Emails” button will be disabled until you filter down to a smaller group. You can request an upgrade to your maximum send limit by contacting the RideAmigos support team.
System Users or Network Users Report
The two most powerful sources for generating email recipient lists are the System Users and Network Users Reports.
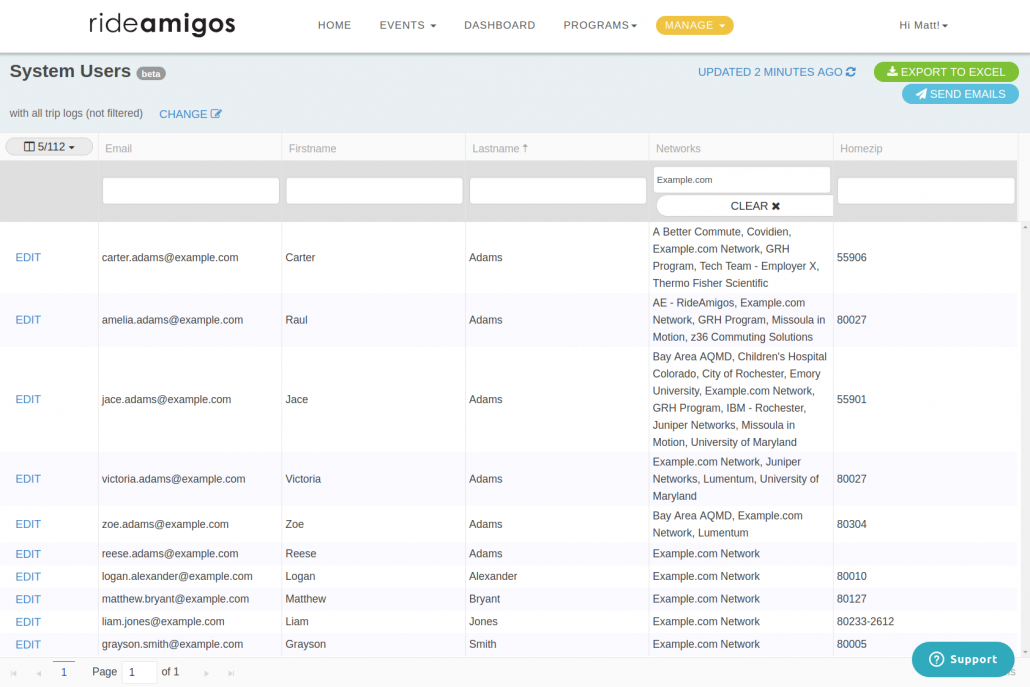
System Users: Available to System Administrators only. Accessed from the “Manage” menu; in the left column beneath System Reports, click on “Users.”
Network Users: Available to System Administrators and Advanced Managers via the Management Dashboard. Choose Reports > Users while viewing a network.
From here, you can add and remove data fields and filter according to the contents of those fields.
In this example, the “Networks” field has been added and filtered to only display users that are members of the Example.com network:

You may also find it useful to add and filter data fields, such as whether the user has logged bike, transit, or carpool trips, or to change the date range filter.
More information on using advanced reporting can be found here.
Once you’ve filtered down to the list of users you would like to email, click the Send Emails button on the top right of the screen, or Report Actions > Send Emails.
Challenge Users Report
To email all participants in a challenge, start by navigating to the Challenges administration area: Manage > Programs | Challenges. Find the challenge you want and click “Users” under the reports column.
You’ll be greeted by a report that looks very similar to the System User report above, populated only by users that are part of the challenge you selected. By default, all users eligible for the challenge will appear.
Note: If your challenge requires users to opt-in, only users that have opted in will be displayed, not everyone who is eligible.
Filter the report if needed. For example, you may want to target a message to users that have completed at least one eligible trip.
Once you have your base recipient list set, click “Send Emails” on the top right.
Incentive Report
To email all participants in an incentive program, navigate to the Incentives administration area: Manage > Programs | Incentives. Find the incentive you want and click “Report.”
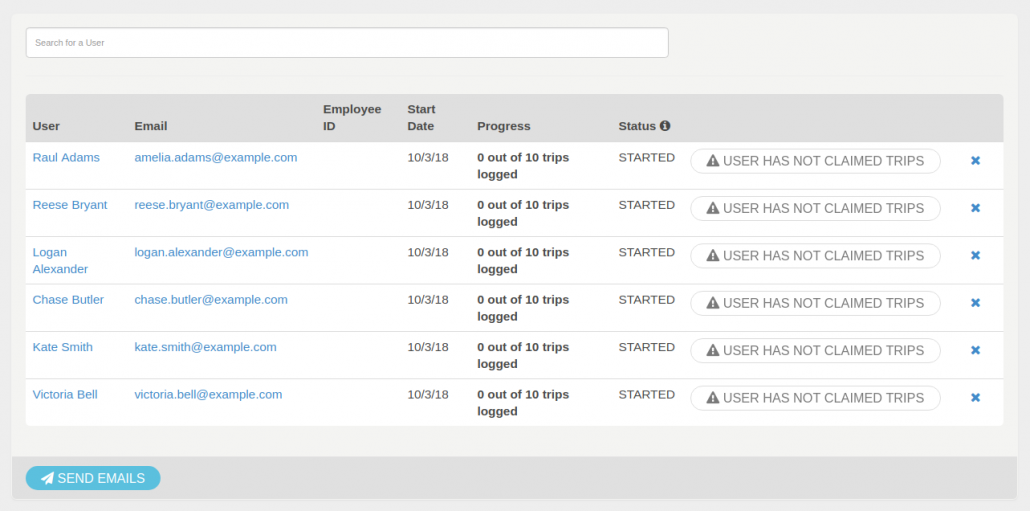
The incentive report displays users that have joined the incentive, which can happen via the auto-join configuration option in incentive setup, or through users joining the incentive manually.
If you are not using the auto-join feature for your incentive and want to send an email to everyone eligible for the incentive, regardless of their join status, use the System Users report to generate a filtered list of users who are members of the eligible network(s).
At the bottom of the participants list, you’ll find a “Send Emails” button.

Point Program Report
To email users of a point program, navigate to the Incentives administration area: Manage > Programs | Point Programs. Find the program you want and click “Report.”
Note: Point Program reports only display users that have already redeemed items through the point program.
If you want to send an email to everyone eligible for a point program, regardless of whether they have redeemed points, use the System Users report to generate a filtered list of users who are members of the eligible network(s).
Within the point program report you can filter according to redemption status: all, new, rewarded, denied, or cancelled.
At the bottom of the report you’ll find a “Send Emails” button.
2) Create your email
Once you’ve established your base list of recipients, the next step is to create your content.

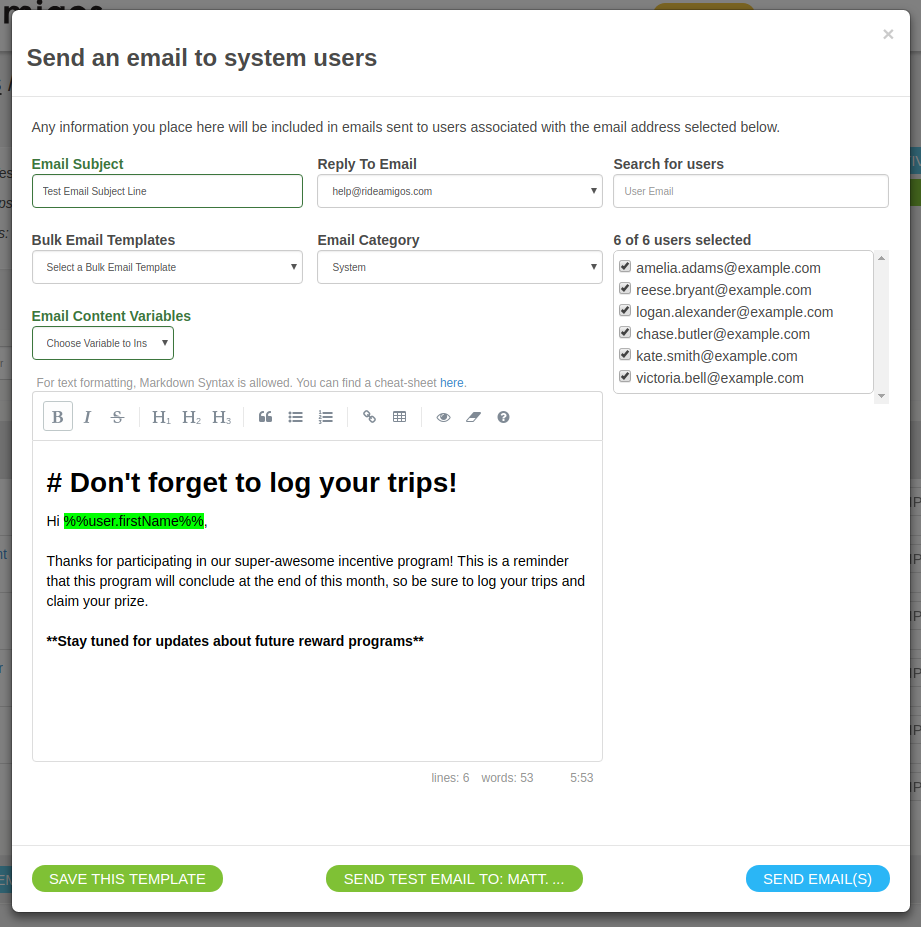
Email Subject – Text that will appear as the subject line of your email.
Reply To Email – Address that will appear if a user replies to your email. Options include your system-wide support email address and the current admin user’s address.
Bulk Email Templates – Select from pre-saved reusable templates for your content. Note that loading a template will over-write any existing content in the subject or body areas.
Email Category – All bulk emails must be assigned a category. This allows users to opt-out of unwanted emails. Default categories are Program and Carpool.
Search for Users / Users Selected – To further refine your recipient list you can search for and select/remove individual users from your base list.
Email Content Variables – In addition to static text your email content can include variables that include data specific to each user receiving the email, such as first name, last name, email address, etc. Select a variable and it will be inserted into the body text.
Email Body – The body text of your email can be formatted using Markdown Syntax – the same method used to format other display items throughout RideAmigos. As you apply Markdown styling to your text it will be reflected in the email body area. The syntax (such as ### or **) will appear in the email body area, but will not be included in the final email.
For instructions on how to use Markdown Syntax to perform advanced formatting like embedding images or tables, check out this Markdown Cheatsheet.
Save This Template – Save the current email as a template for future use. The template’s name will be the current subject line.
Send Test Email – Send a test version of the email to the address of the user who is creating the email.
Send Emails – Send the email to the list of selected users.