With all the options available to make Incentive programs work for you, there are a number of considerations that go into managing one. From managing multiple states of a Digital Inventory item, forcing approval for incentive claims, choosing raffle winners, and managing incentives with multiple rewards or percentage-based completion, there are many different ways that your program may differ from others.
We'll break down each of these nuances with everything you need to know about how they work and how you'll interact with them.
Incentive Overview
From the report page for your Incentive, there are a number of things that you can use to help manage your incentive participants and their reward statuses. To get view these features, navigate to your incentive report:
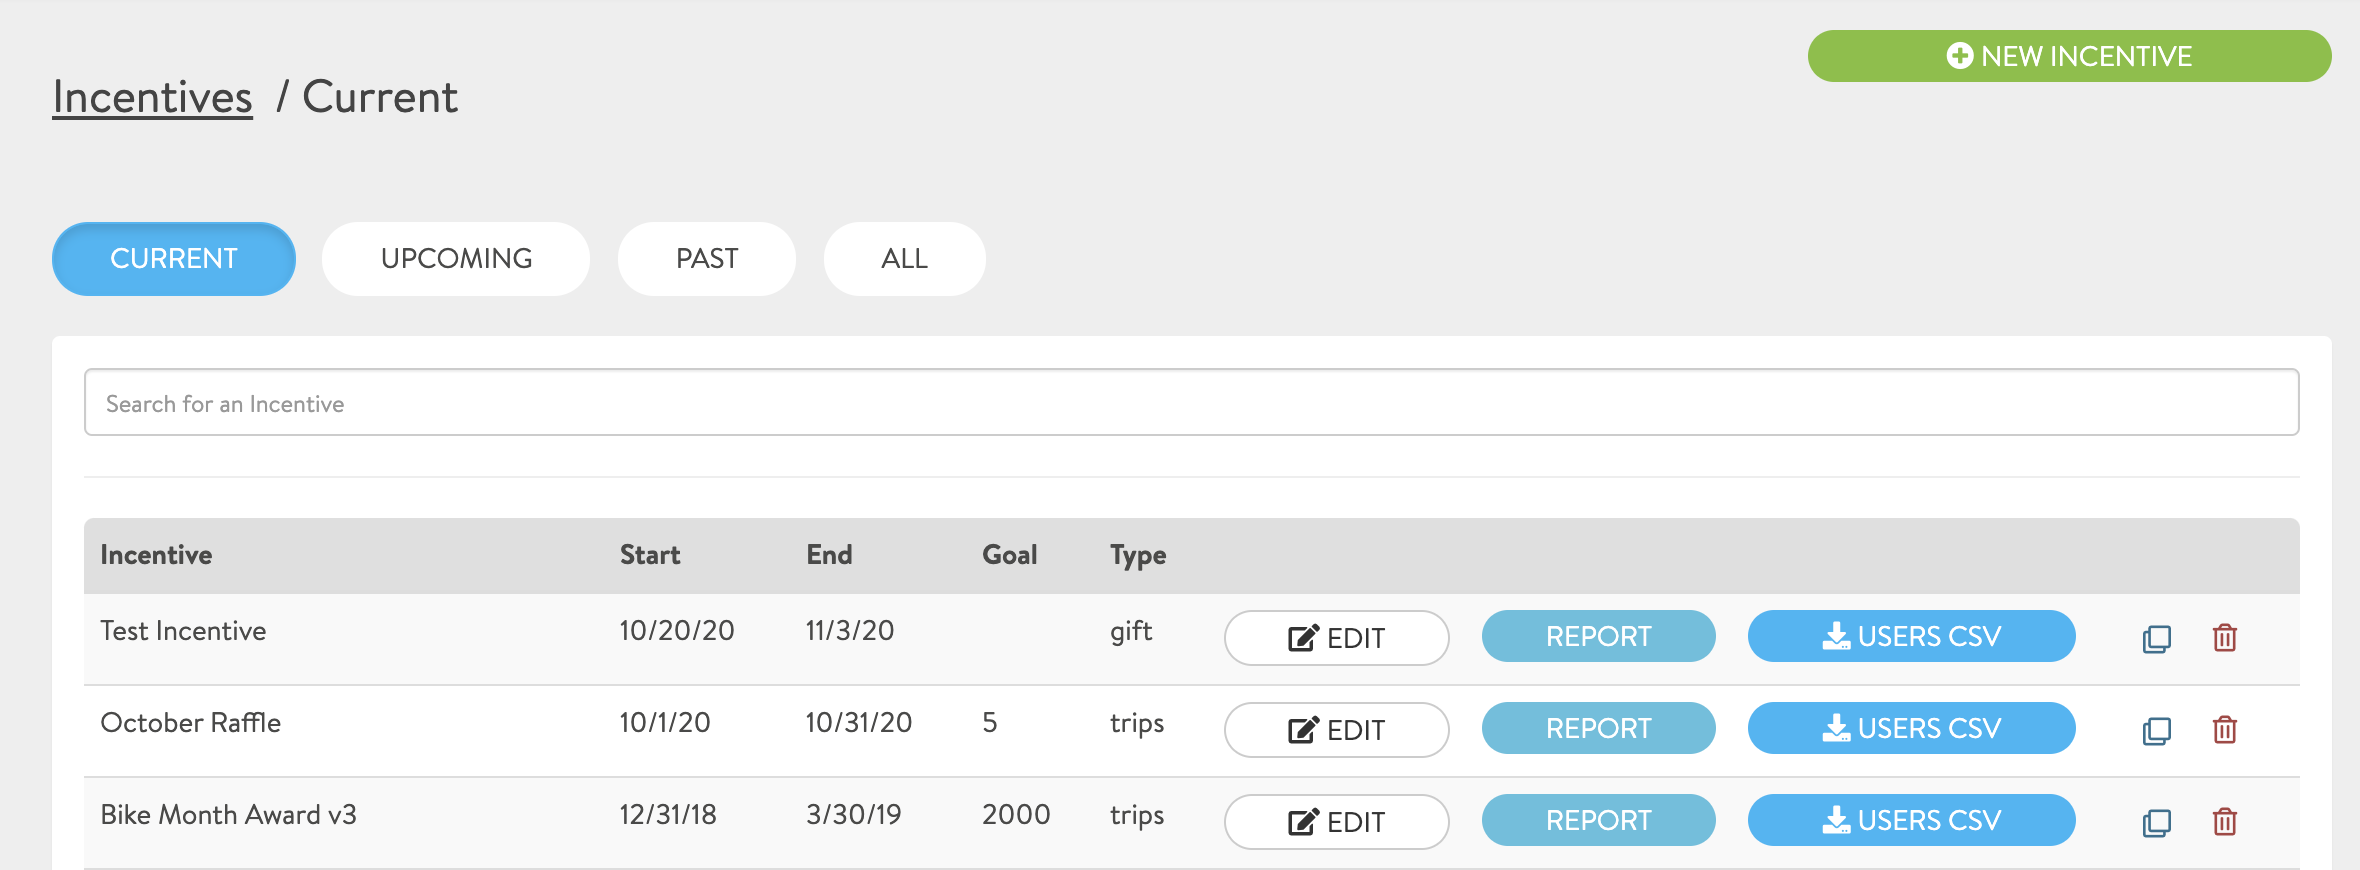
Manage>Incentives>Click "Report" for your program

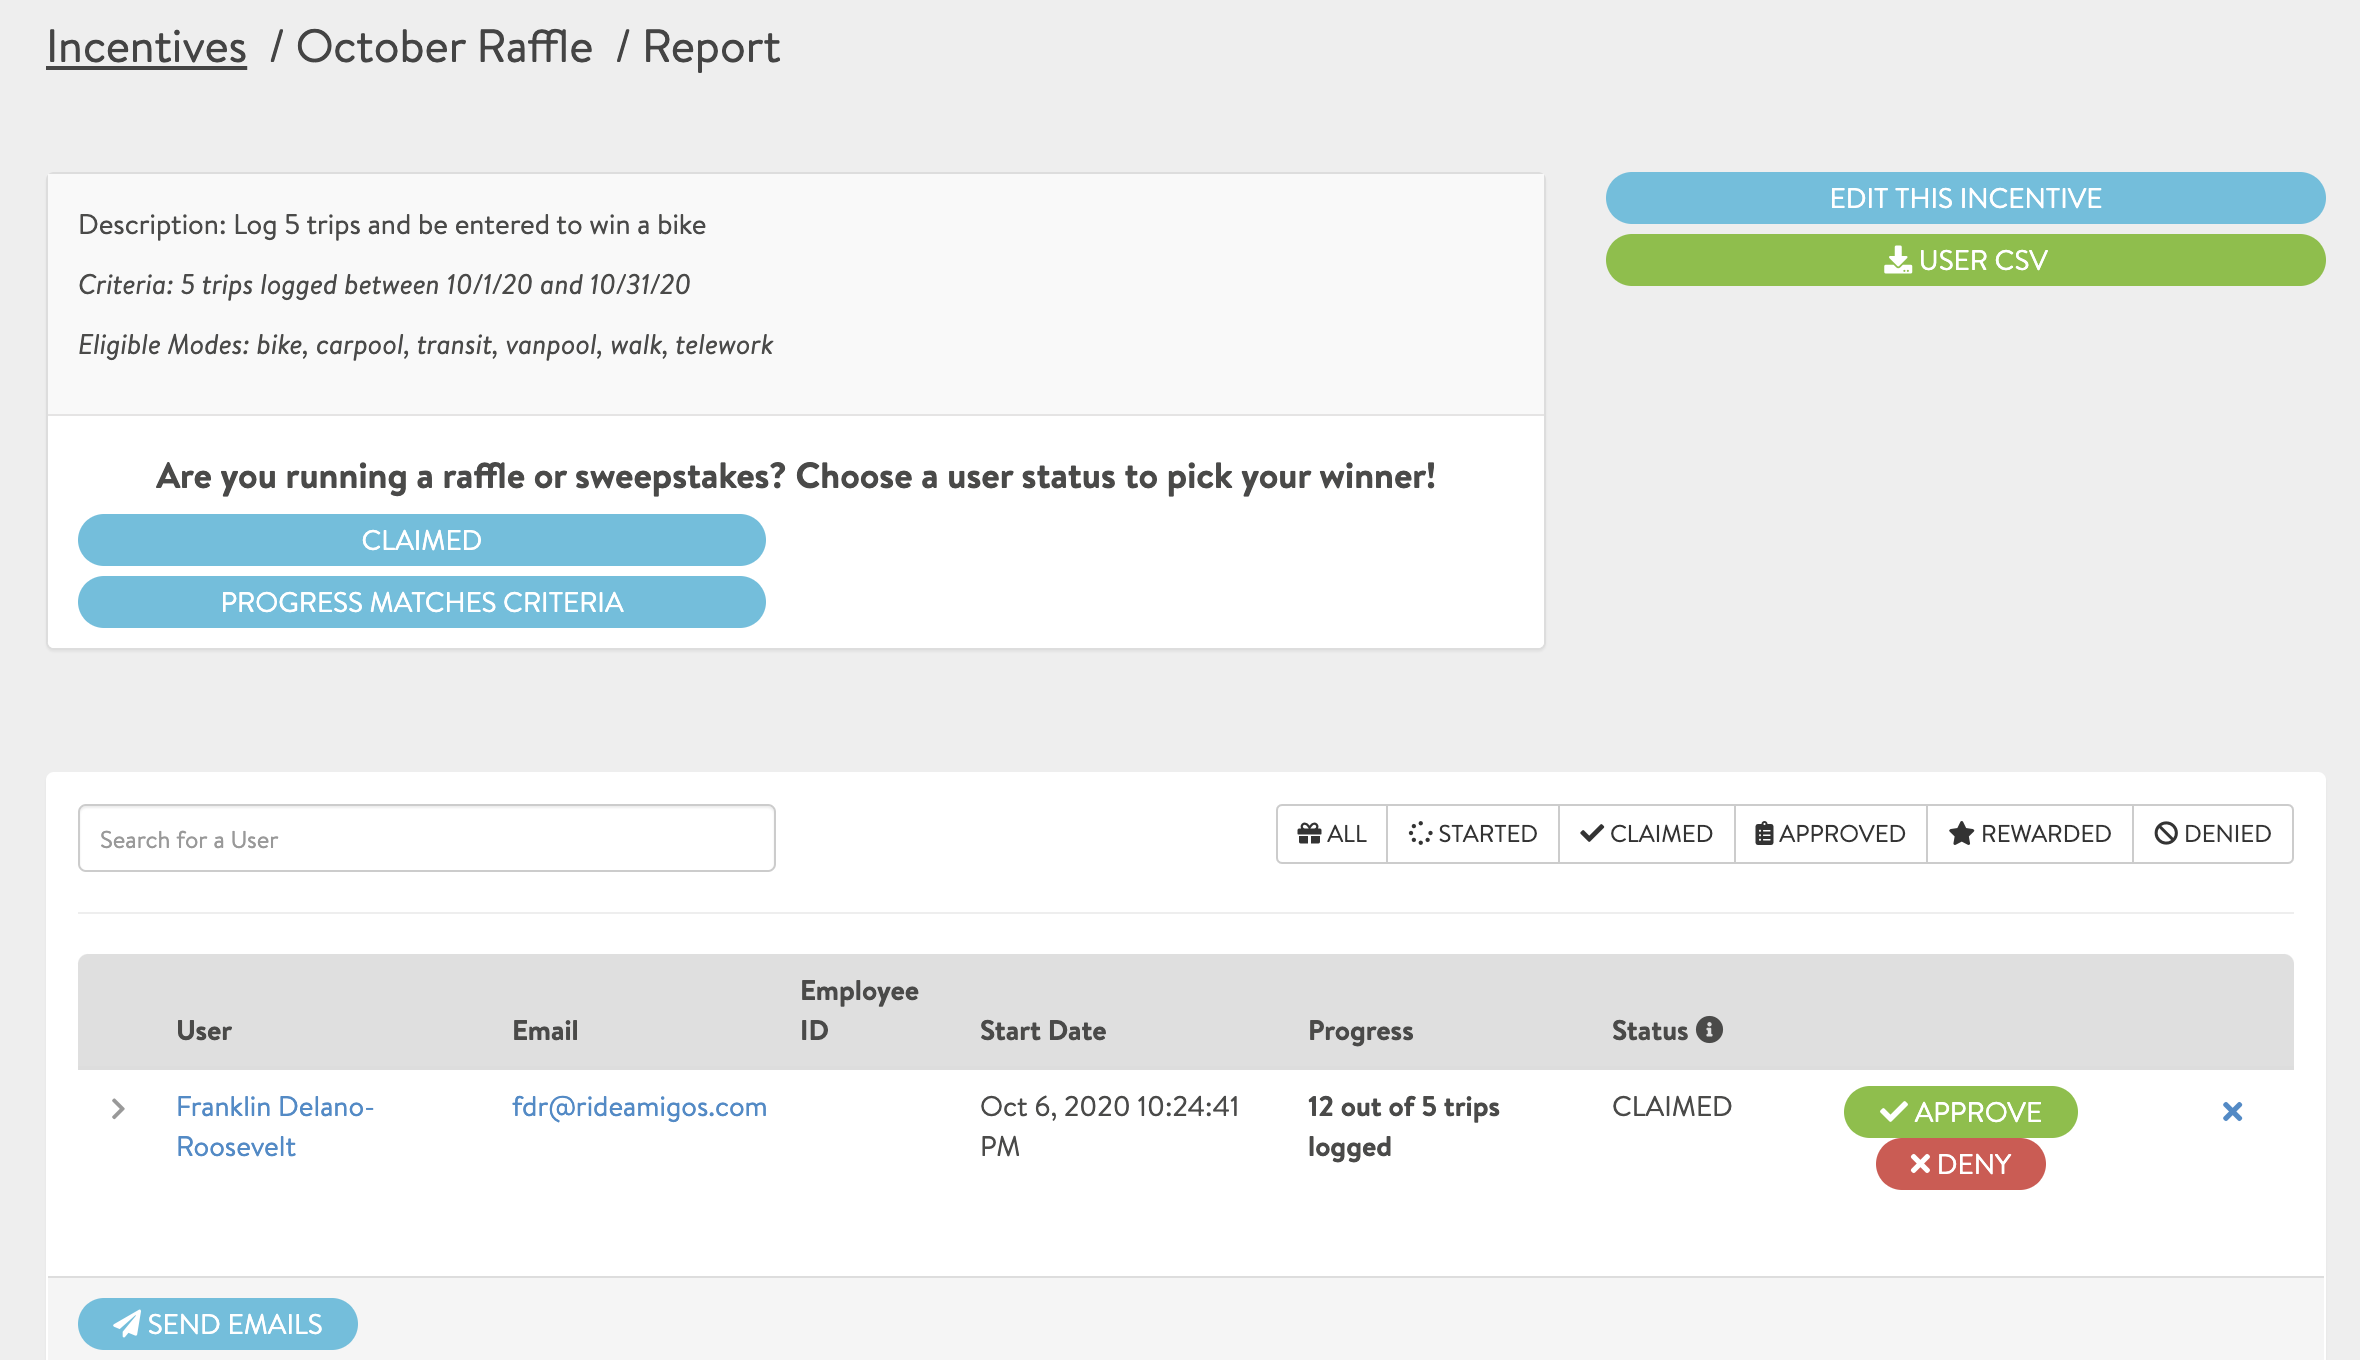
Once you've opened the program report you'll see a brief overview of the program that includes the description, criteria, and eligible modes. To the right of this summary, you should also see two buttons to edit the incentive, and download a User Report as a CSV. This CSV can be very useful for manual fulfillment, as well as analyzing and filtering users based on their reward progress, personal details, and more.
Below the report headings is where the bulk of the reports functionality comes into play. This is a full report of all users who are participating in the incentive. The web report includes each user's name, email, the date they started participation, their overall progress in the program, and their current status. Additionally, if the user has claimed their reward, additional buttons will appear to help you manage them.
Approving/Denying a users request isn't necessary for all rewards, but it is helpful for programs that are being monitored and fulfilled manually.
Participant Details
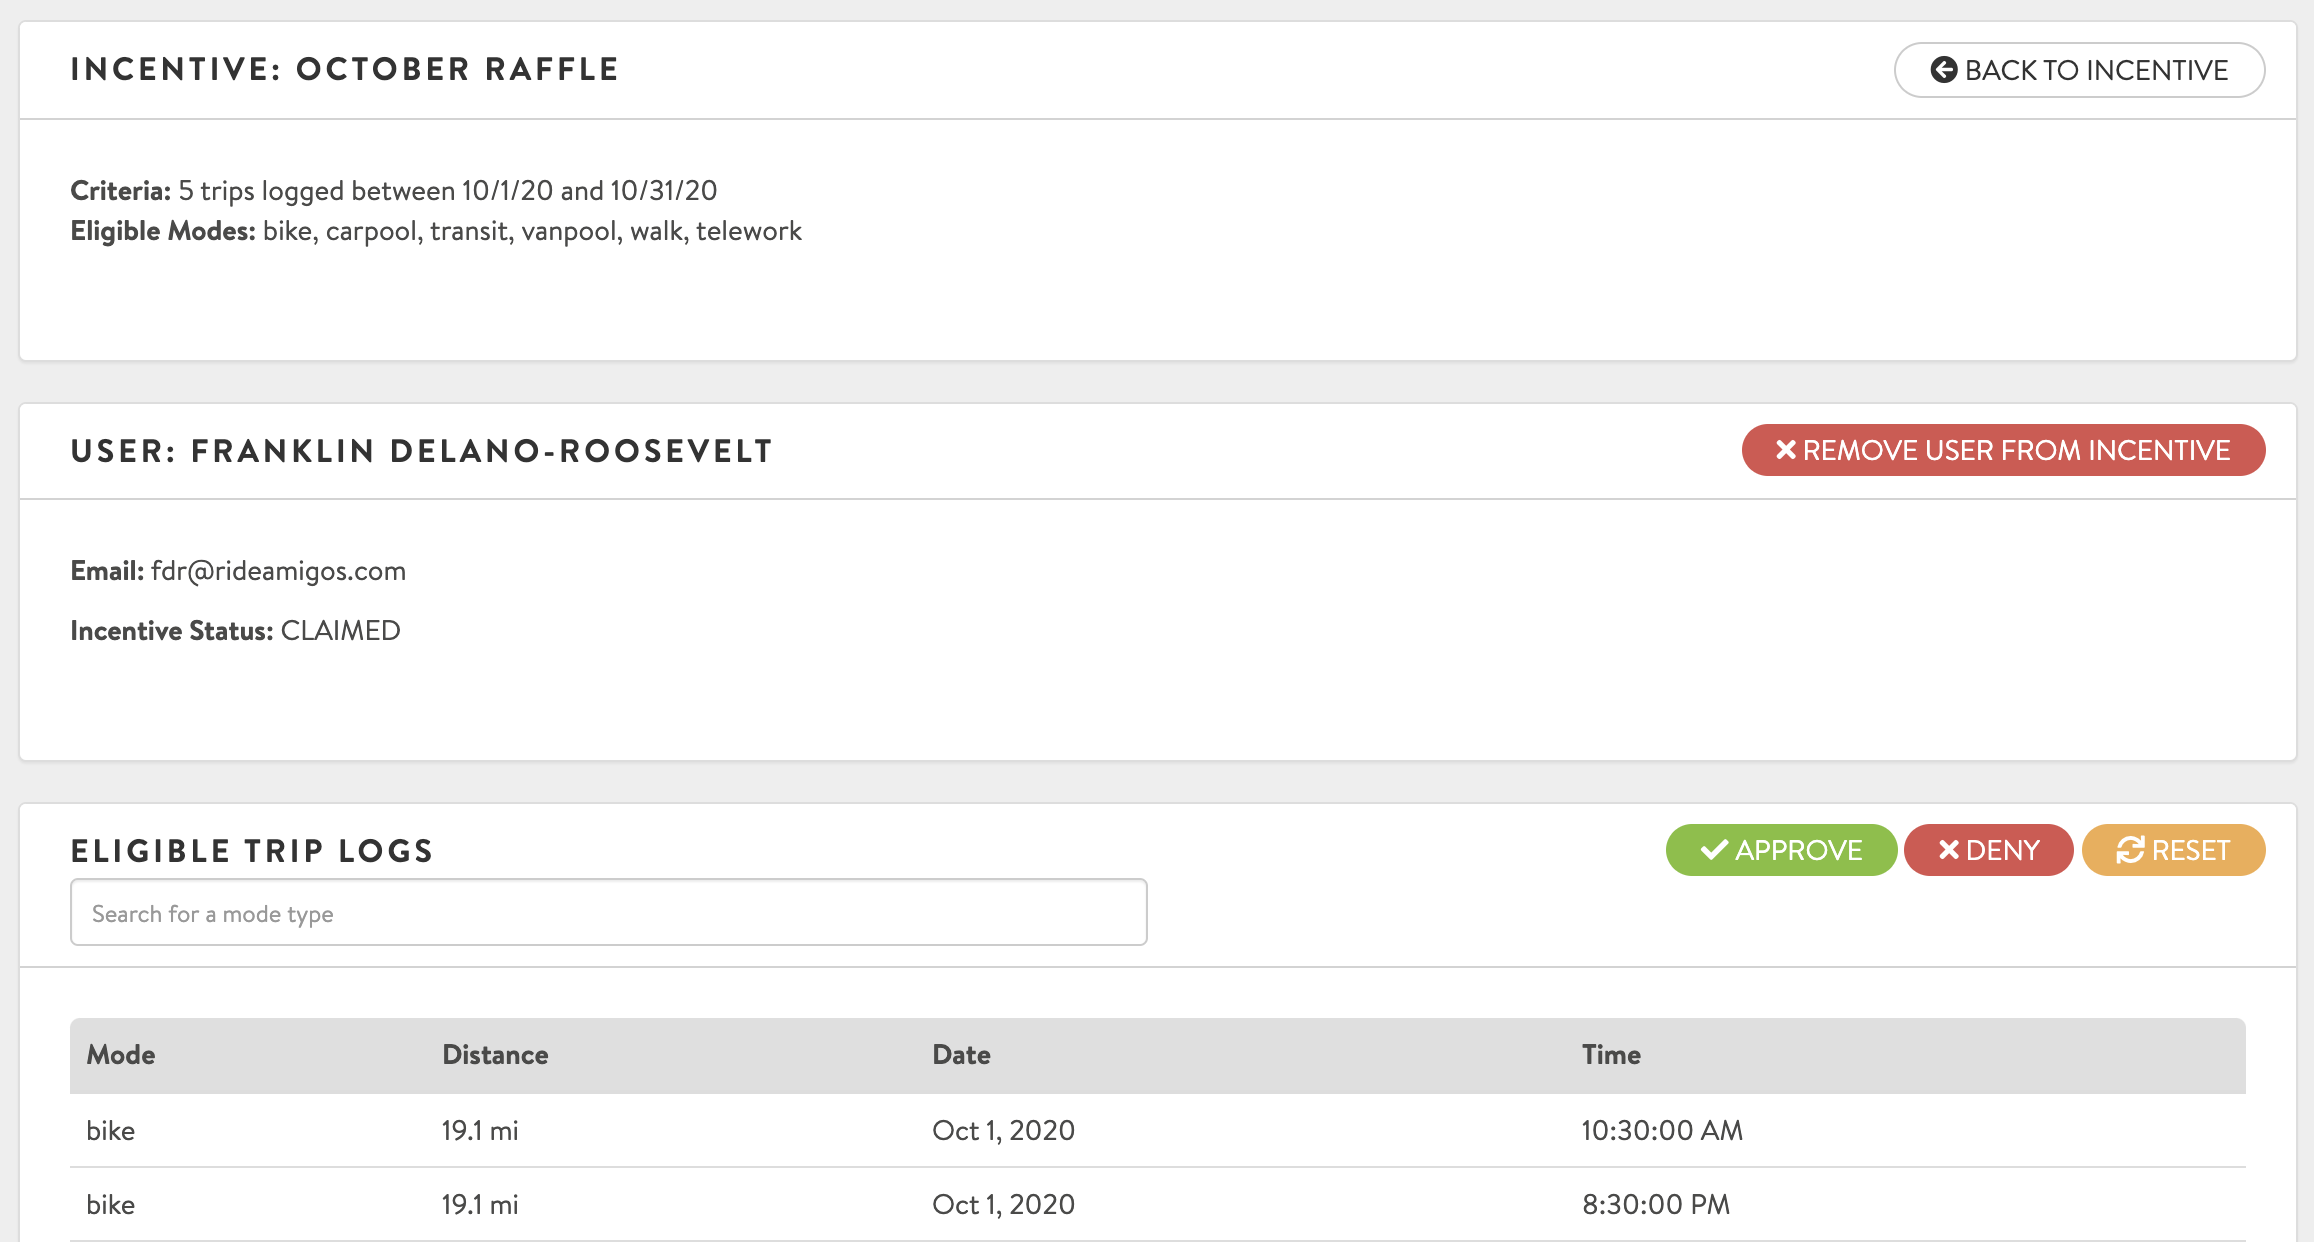
You can also check in more detail the progress a user has made by clicking on their name in the Incentive Report, as well as more granularly control a user's status and progress.

One option that appears here is the ability to force approval for a user. This can be done to approve any user who has joined the incentive, regardless of their status.
It is also just a couple of clicks to remove a user from the incentive entirely. This makes it easier to control the incentive participants at the user level, rather than the network level.
Digital Inventory
By default, Digital Inventory items are redeemed at the time the reward is claimed. As an example, one of the most common uses of DI items is sending an email to the claimant. This triggers immediately, so the user doesn't need to wait to receive the information. However, if you are looking for automated fulfillment, but with manual/delayed approval, then DI states are the tool to use.
If you've already set up digital inventory states, then this will teach you how to use them in your program. If you've not yet created the states you'll be using, you can learn how to make and manage them with our guide on DI States.
Once your DI item is set up with states, and your users begin redeeming the item, then you can manage them from within the Incentive Report. Once a user has claimed your item, you can change their reward state by selecting it from the drop-down menu next to their reward status. After selecting the state and clicking "Go", the state will change and the workflow will proceed.

Raffle Picker
If you're running a program that culminates in a raffle event, we have a handy tool that will enable you to impartially choose your winner!

The tool will allow you to choose a winner from two groups, depending on the requirements for your Raffle. You may choose to draw from all users who have claimed the incentive, or you may draw from the users who have met the criteria for completing the program, whether they have claimed it or not.